
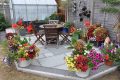
 Fancy a nice lockdown project to get your (saw) teeth into? Of course you do! Here’s how to make a splendid beer rack out of an old pallet. Now we’re not claiming this to be the most efficient, space-saving way to store your beers, but it should at least keep you busy for a few hours. Also: It looks cool!
All measurements are correct for the pallet we used, but you may need to allow for irregularities in your pallet wood size. We designed our beer rack to comfortably fit six bottles of 300ml beer, but you can make yours as grand and as capacious as you like. Just consider the weight of the beer bottles, and remember that we’re not responsible if your rack comes crashing to the floor in an explosion of splinters, glass and frothing booze!
Top Tip: Pre-drill pilot holes for the screws first. This will prevent the wood from splitting when driving in the screws. It also makes things immeasurably easier when it comes to lining up the angled shelving (which is the trickiest part).
- Carefully prize the wooden planks off your pallet using a jemmy, claw hammer or similar wrecking tool. Stubborn wood can be parted by using a heavy-duty hammer, a strong chisel and forceful wiggling. Once you’ve dismantled the pallet, remove any nails that might cause mischief. You may wish to sand down and/or stain the wood prior to assembly, but this project is supposed to look rustic, and any blemishes and rough edges add to its knockabout charm. At least, that’s our excuse.

- Align the three bits of wood that will form the main assembly (A) and screw in the supporting panels (B) on the reverse side to hold them in place.
- Mark out your screw holes for the shelves on the rear of the main assembly. Check and double-check your measurements, then drill the guide holes.
- Saw to size the three shelf slats (C) and cut out the bottle-holding holes using a 35mm drill bit.
- Attach the supporting blocks (E) to the base of the lower shelf (D) and screw on to the base of the unit.
- Locate your shelf planks above the screw holes, make sure they all line up nicely then
screw the shelves secure. - Mount your unit to a sturdy shed wall or alternatively, lash it to a tree for outdoor entertaining.
- Fill the rack with beer. Drink Beer. Repeat.


What have you made with old pallets? Have you made your own DIY beer rack? Let us know in the comments below.
 The Two Thirsty Gardeners, Rich and Nick, are bloggers who love gardening, eating and drinking in equal measure! They love to share tales from their allotment including their experiments turning the spoils of their crops into alcohol, both the good and the bad!
To find out more about Rich and Nick, click here.
The Two Thirsty Gardeners, Rich and Nick, are bloggers who love gardening, eating and drinking in equal measure! They love to share tales from their allotment including their experiments turning the spoils of their crops into alcohol, both the good and the bad!
To find out more about Rich and Nick, click here.


Leave a Comment