
In a world where the cost of living is soaring, it’s reassuring to know that growing flowers and vegetables from seed remains brilliant value for money.
Unlike petrol, gas and food, the price of seed has barely risen. It’s still possible to fill plant pots, hanging baskets and garden borders with a riot of colour without digging deep into your pockets.
Take the French marigold, a favourite for dazzling summer colour. A packet of 150 seeds has a price tag of just £2.15, which is astonishingly good value. A pack of Runner Bean ‘Scarlet Emperor’ seed, an all-time favourite of many gardeners, costs just £2.99 for 50 seeds.
F1 hybrid seed, a superior grade that produces uniform, vigorous plants, can cost a little more but it’s still excellent value for money, compared to the cost of buying young plants at garden centres.
Let’s look at the nation’s favourite edible, the tomato. A pack of 20 F1 hybrid ‘Sweet Million’ seeds has a price tag of £3.99. F1 hybrid seeds often achieve 100 per cent seed germination, so each tomato plant will cost just 20 pence. And remember, tomato plants will be laden with hundreds of fruits between summer and autumn.
So if we’ve convinced you to get sowing, follow our top tips for successfully growing flowers and vegetables from seed.
 1. Be quick off the mark
 1. Be quick off the mark
Demand for seeds soared during the pandemic, with UK seed suppliers working around the clock to meet unprecedented levels of orders. While the situation has settled down, demand remains higher than normal, so place seed orders early before stocks sell out, to avoid disappointment.
If the seed racks at your local garden centre are looking sparse, order online from suppliers such as Kings Seeds, Thompson & Morgan, Suttons and Mr Fothergill’s. You’ll be able to see instantly what’s in stock and order safe in the knowledge that fresh seed will be dispatched straight from the warehouse.

Credit: Pixabay
2. Put old seed to the test
During lockdown, many of us couldn’t buy flower and vegetable seeds while garden centres remained closed, so we dabbled with sowing leftover seed from previous years. While out-of-date seed can spring into life, germination can be patchy. To avoid disappointment, experiment by sowing a handful of ageing seeds into a plant pot, a few weeks earlier than recommended on the packet. If they germinate, you’ll know that the rest are good to sow at the correct time.
3. Buy quality compost

A trusted brand of seed and cuttings compost is essential – don’t be tempted to use up old multipurpose compost for nurturing seeds into life.
Why is seed compost different? Firstly, it’s a fine grade: there shouldn’t be any big lumps of bark in the mix that could hinder seed germination. Manufacturers often incorporate vermiculite, a naturally occurring mineral that boosts aeration and drainage, helping to prevent seedlings from rotting. Seed compost will be low in nutrients, containing just the right balance to coax seeds into growth and give them the best start in life.
4. Keep compost snug
Compost that has been stored in sheds, greenhouses and garages should be brought indoors at least 24 hours before sowing, to bring it up to room temperature. Sowing seeds into freezing compost can hinder germination.
When shopping for compost, look for compost bags that have been stored under cover, so the compost hasn’t become saturated with rain water. Always choose fresh stock – if bags look old and tatty, hinting that they’ve been sitting around since last season, walk away.
5. Go steady when sowing
 5. Go steady when sowing
To keep seed fresh, only open the packet when you’re ready to sow. Fill seed trays evenly with compost and gently press it down. Try to sow seed thinly by sprinkling it evenly over the compost, or seedlings will become congested once they get going.
Whatever you’re sowing, check the packet to see if the seed needs to be covered with a fine layer of compost, or sown on the surface of the compost where it’s exposed to light. Don’t forget to label each seed tray to avoid mix-ups too!
6. Propagators at the ready

A propagator is one of the cheapest and most effective tools in the gardener’s armoury. Put simply, it’s a seed tray with a clear plastic lid over it. This handy kit ensures that seeds are kept in a warm, humid environment, with optimum conditions for germination. For best results, sit propagators in a bright room, out of direct sunlight. Propagator lids can be removed after germination, so that seedlings won’t become leggy (tall and spindly).
While a basic propagator can be bought for less than £10, it’s easy to make your own. Instead of using a seed tray, sow seeds into a flower pot instead. Then just take a clear freezer bag and place it over the top of the pot, securing it around the pot’s rim using an elastic band.
7. Water wisely
 7. Water wisely
Successfully nurturing seedlings into life requires seed compost to be kept evenly moist, without turning it into a quagmire. The easiest way to get it right is to gently moisten the surface of the compost using a hand-operated spray bottle filled with tepid tap water.
Seed compost should never be watered using rainwater collected in water butts, because it can contain pathogens that risk infecting vulnerable seedlings with disease. Rainwater is fantastic for irrigating established garden plants, however, so keep your supplies reserved for summer.
8. Moving seedlings to plant pots

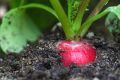
When seedlings are actively growing and have developed their first true pair of leaves it’s time to prick them out, which is the process of transferring them individually into plant pots, where they have space to develop.
Holding the seedling carefully by one of its leaves (and never by the stem, which can easily be crushed or snapped), use a pencil or dibber to gently tease the roots from the compost. Plant at the same depth in a small pot of multi-purpose compost and gently firm the seedling in.
9. Keep tender plants warm
Remember that popular bedding plants labelled as ‘half-hardy annuals’, such as petunias, busy Lizzies and marigolds, won’t tolerate frost. Even after seedlings have grown into young plants, they’ll need protection from cold until after the last frosts in late May or early June. It’s the same story for tender vegetables including tomatoes, peppers and runner beans, so don’t be in a rush to plant them out.
Have you ever tried growing plants from seed before? Have you had any seed successes? Let us know in the comments.
 Marc Rosenberg is a freelance garden writer and editor. A former journalist with Amateur Gardening and Horticulture Week magazines, he holds seven Garden Media Guild Awards. Marc has written for publications including The Garden magazine, BBC Gardeners’ World and RHS online.


Hi, The clear plastic trays that cuts of meat come in from the supermarket, make great propagator lids, and are free, and a good way to recycle plastic. also yoghurt pots etc. are excellent plant pots for growing on,(make sure to poke some drainage holes in the bottom)
There is also a good product called “The Paper Potter” available from Nether Wallop trading co to make paper pots from newspapers that rot down in the soil, and mean that you do not damage the roots of your precious plents when planting out. (you can also use toilet roll middles)
Steve T
Thanks for the extra tips Steve, these are great ideas! Thanks, STIHL GB